Identity Authorization
This scenario guides platform administrators through setting organizational boundaries with tenants, packaging permissions in roles, assigning roles to users, and verifying menu, button, and resource access.
Target Outcome
- The user belongs to the correct tenant and has a role appropriate to the job.
- The user sees only authorized subsystems, menus, and buttons.
- Platform governance permissions remain separate from regular tenant permissions.
- Changes can be verified by a new session and traced through records.
Applicable Roles
operator: confirms operational access requirements without taking ownership of permission metadata.providerandenduser: validation accounts for the resulting access model.
Before You Start
- Confirm the tenant, tenant, and responsibilities of the user.
- Prefer built-in roles and create a custom role only when responsibilities are not covered.
- List required and explicitly prohibited menus, actions, and resource scopes.
- Prepare a validation account that does not carry production workloads.
Procedure
| Step | Action | Reference | Completion Signal |
|---|---|---|---|
| 1 | Understand tenant, user, role, and menu relationships | Identity and Access Model | Boundaries and role choice are clear |
| 2 | Select a role from the default capability matrix | Role Comparison | Role matches responsibilities |
| 3 | Confirm member ownership in Tenant Settings and Team Members | Tenant Settings, Team Members | The member is active in the correct tenant |
| 4 | Select a built-in role or create a least-privilege role | Roles | The role contains only necessary permissions |
| 5 | Sign in with the validation account and inspect menus, actions, and resource scope | Roles | Allowed items work and prohibited items do not |
| 6 | Review the permission change and validation in Operation Logs | Operation Logs | Time, operator, and target are traceable |
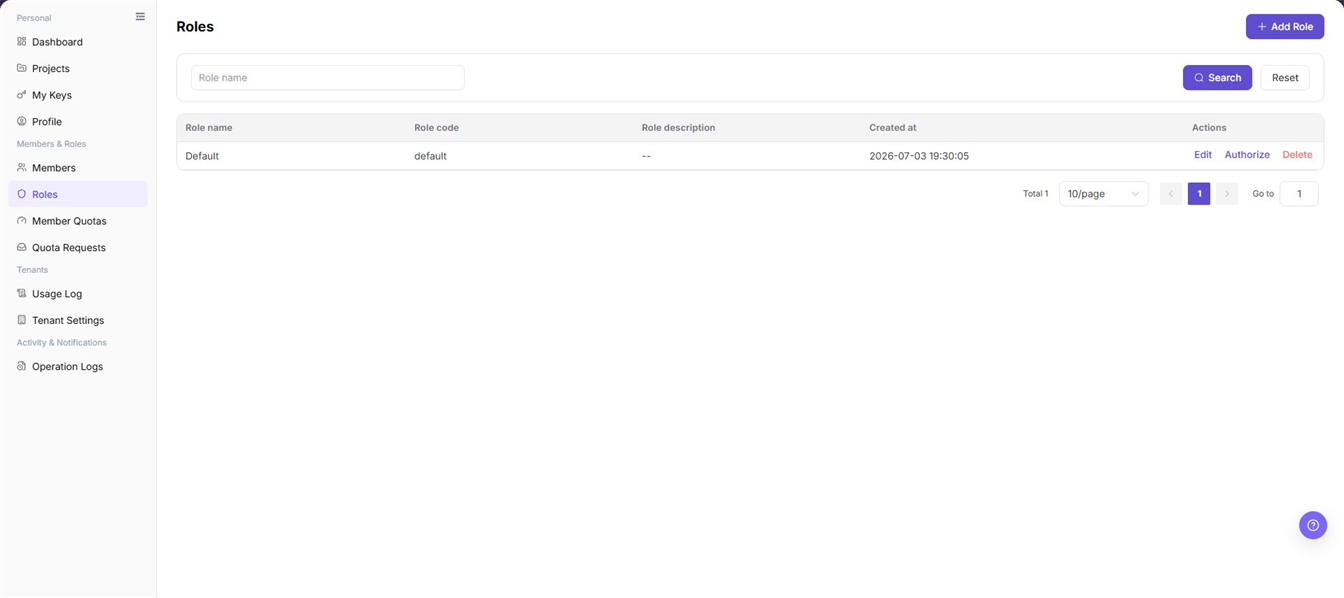
The Role Management view is used in steps 3-5 to confirm the role record and its scope before signing in with the validation account.
Completion Checklist
Purpose: These are the exit criteria for the current feature task. Use them to decide whether the result is observable and reviewable and whether you can continue to the next step in the scenario. They do not repeat the procedure; if any item fails, follow the troubleshooting section below.
| Check | Pass Criteria |
|---|---|
| 1 | The user belongs to the correct tenant and is active. |
| 2 | The role matches responsibilities without unnecessary platform permissions. |
| 3 | Required menus and actions are available. |
| 4 | Prohibited menus, actions, and resources are unavailable. |
| 5 | A fresh session reflects the change and records are traceable. |
Troubleshooting
| Symptom | Check First |
|---|---|
| Target menu is missing | Tenant assignment, role assignment, menu permission, and a fresh session |
| Menu is visible but actions fail | Action permission code, API permission, and role-menu mapping |
| User sees another tenant's resources | Tenant boundary, resource authorization, and business filters |
| Changes do not take effect | Session cache, re-login, role state, and whether changes were saved |
| Custom role is too broad | Compare it with built-in roles and remove unrelated menus and APIs |
User Manual
Open the user-manual entry and choose the subsystem whose access you are configuring